Alacritty config
In my previous post about WSL setup I mentioned that Alacritty gave me some glitches in the LF file manager. Here I will explain how I finally configured Alacritty and made it my main terminal emulator.
Why did I want to change wsltty?
Maybe it is good to explain my motivation to change wsltty to another emulator. Yes, I really like wsltty and I would recommend it to anyone but I missed some capabilities of more flexible configuration there, especially configuration of the fonts rendering where I can fine tune distance between lines, between characters and adjust positions of glyphs.
And I wanted to have something new, more flexible but yet simpler to configure.
Why Alacritty?
I like Alacritty preliminary because of its rendering quality and simple configuration. It supports UTF-8 fully, but does not have good support of Emojies. Configuration is made via simple “YAML” file.
Because I almost never use emojis in my texts and terminal, I gave it up for better support of Nerd Fonts with all special glyphicons. It allows me to use icons for LF file manager and utilities like ls deluxe.
If you are using digraphs, then Alacritty might not be for you. At least on Windows for the WSL. wsltty can display almost all digraphs from he VIM digraphs table, while Alacritty does not show all Asian and some other symbols.
Alacritty setup
Fonts
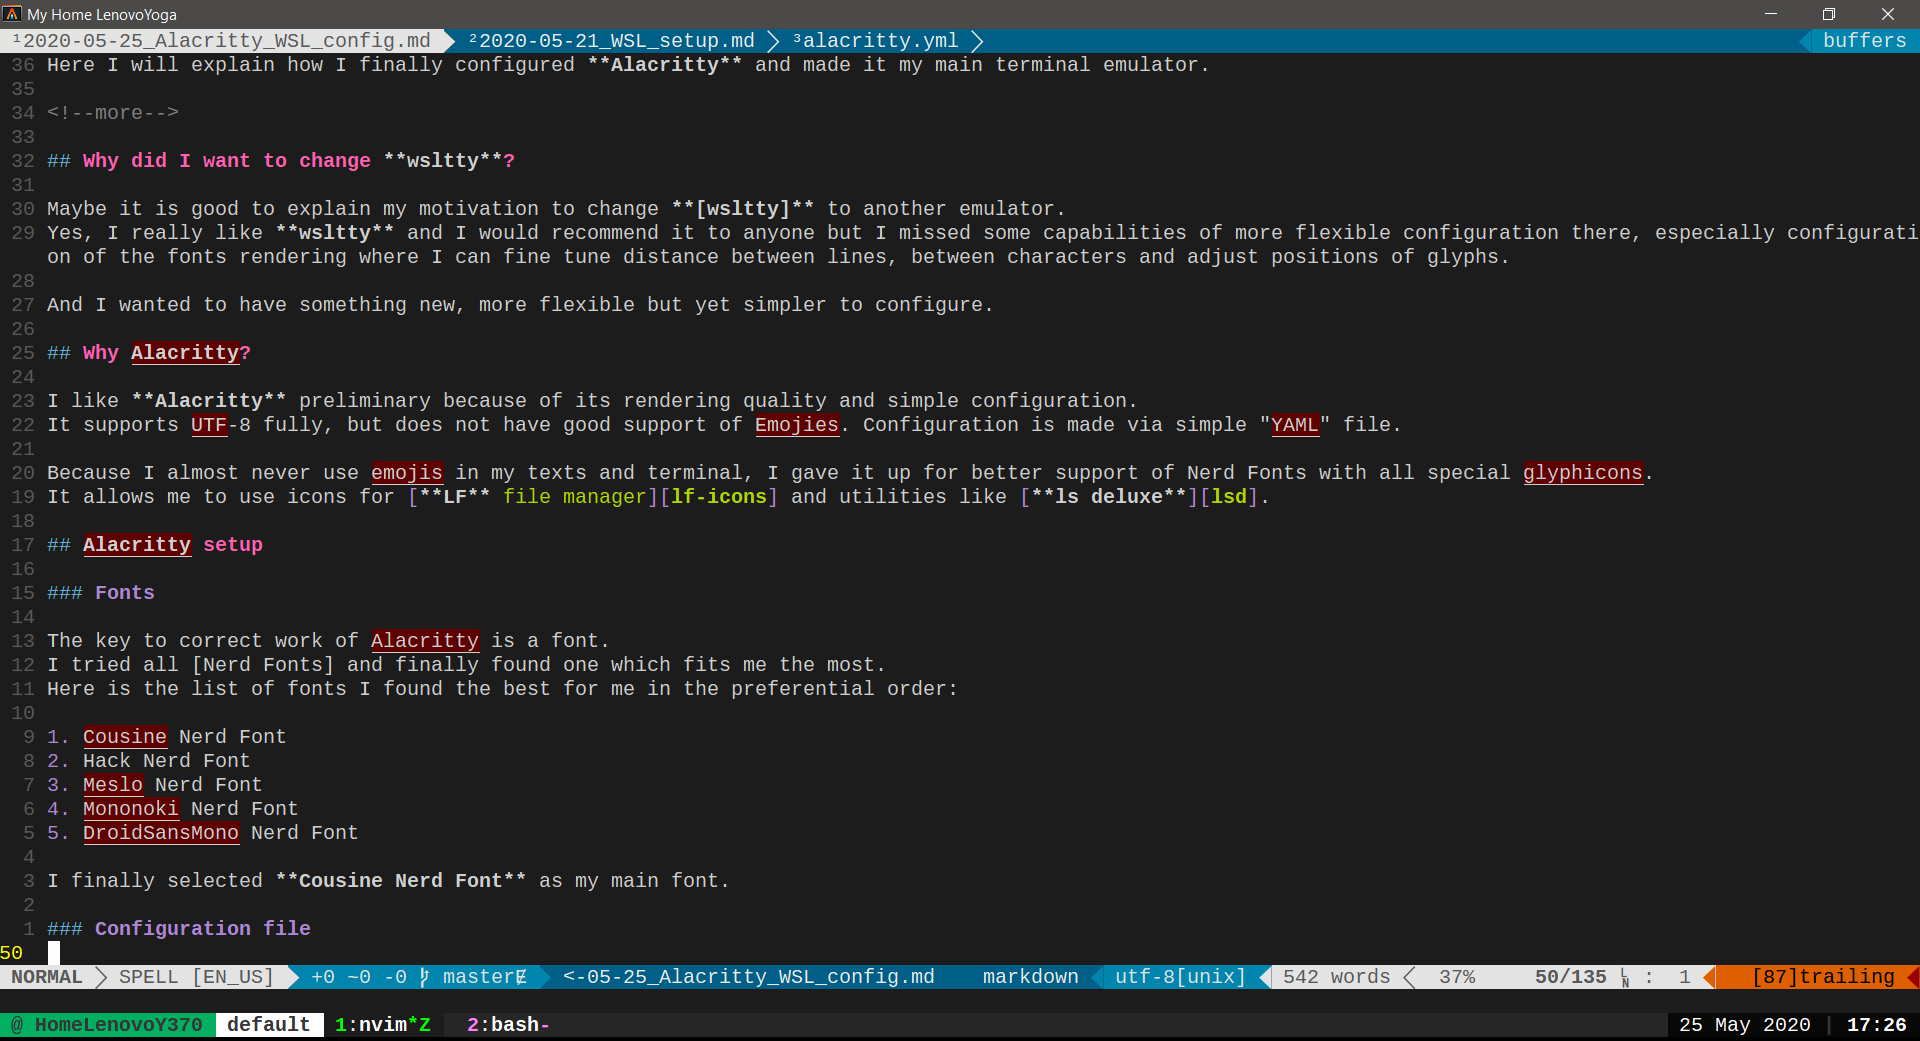
The key to correct work of Alacritty is a font. I tried all Nerd Fonts and finally found one which fits me the most. Here is the list of fonts I found the best for me in the preferential order:
- Cousine Nerd Font
- Hack Nerd Font
- Meslo Nerd Font
- Mononoki Nerd Font
- DroidSansMono Nerd Font
I finally selected Cousine Nerd Font as my main font.
Configuration file
Then comes the easiest part - Alacritty configuration. Just follow the guide and make your own file.
Here is mine (I removed all strings which I don’t setup):
 1window:
 2  decorations: full
 3  startup_mode: Maximized
 4  title: My Home LenovoYoga
 5font:
 6  normal:
 7    family: Cousine NF
 8  size: 12.0
 9  offset:
10   x: 0
11   y: 2
12  glyph_offset:
13   x: -1
14   y: 0
15draw_bold_text_with_bright_colors: false
16colors:
17  primary:
18   background: '#000000'
19   foreground: '#FFFFFF'
20  #### { My theme
21  #
22  normal:
23   black:   '#000000'
24   red:     '#ff6060'
25   green:   '#60ff60'
26   yellow:  '#ffff36'
27   blue:    '#1296be'
28   magenta: '#ff4dff'
29   cyan:    '#54ccef'
30   white:   '#ffffff'
31
32  bright:
33   black:   '#363636'
34   red:     '#ff8080'
35   green:   '#18ed93'
36   yellow:  '#ffff80'
37   blue:    '#1bbae9'
38   magenta: '#ff80ff'
39   cyan:    '#8eddf4'
40   white:   '#ffffff'
41  #
42  #### } End of my theme (MobaXterm B/W theme)
43background_opacity: 1.0
44live_config_reload: true
45shell:
46  program: wsl
47  args:
48   - "~"
49winpty_backend: false
50key_bindings:
51  # (Windows, Linux, and BSD only)
52  - { key: V,        mods: Control|Shift, action: Paste            }
53  - { key: C,        mods: Control|Shift, action: Copy             }
54  - { key: Insert,   mods: Shift,         action: PasteSelection   }
55  - { key: Key0,     mods: Control,       action: ResetFontSize    }
56  - { key: Equals,   mods: Control,       action: IncreaseFontSize }
57  - { key: Add,      mods: Control,       action: IncreaseFontSize }
58  - { key: Subtract, mods: Control,       action: DecreaseFontSize }
59  - { key: Minus,    mods: Control,       action: DecreaseFontSize }
60  # (Windows only)
61  - { key: Return,   mods: Alt,           action: ToggleFullscreen }
Full default configuration you can find here.
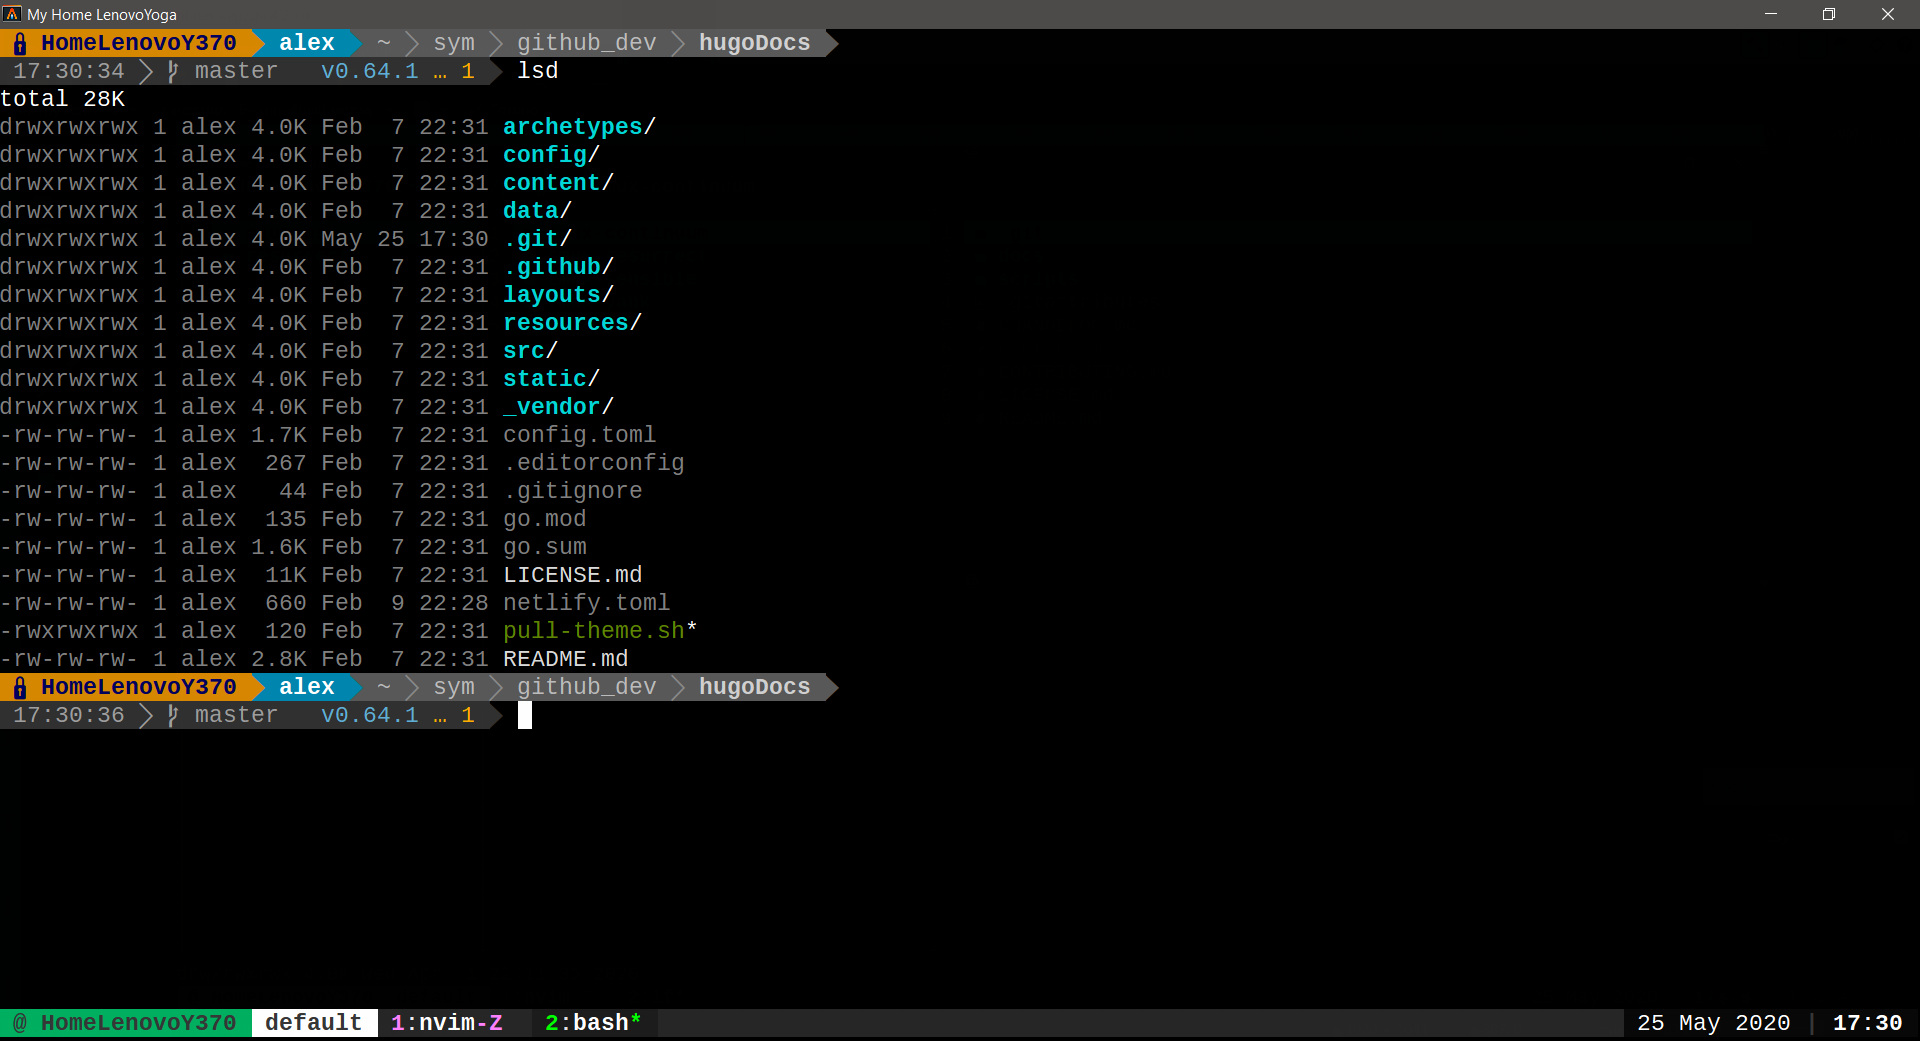
Screenshots
Here are screenshots of how Allacrity looks on my home PC.
Alacritty Screenshot 1
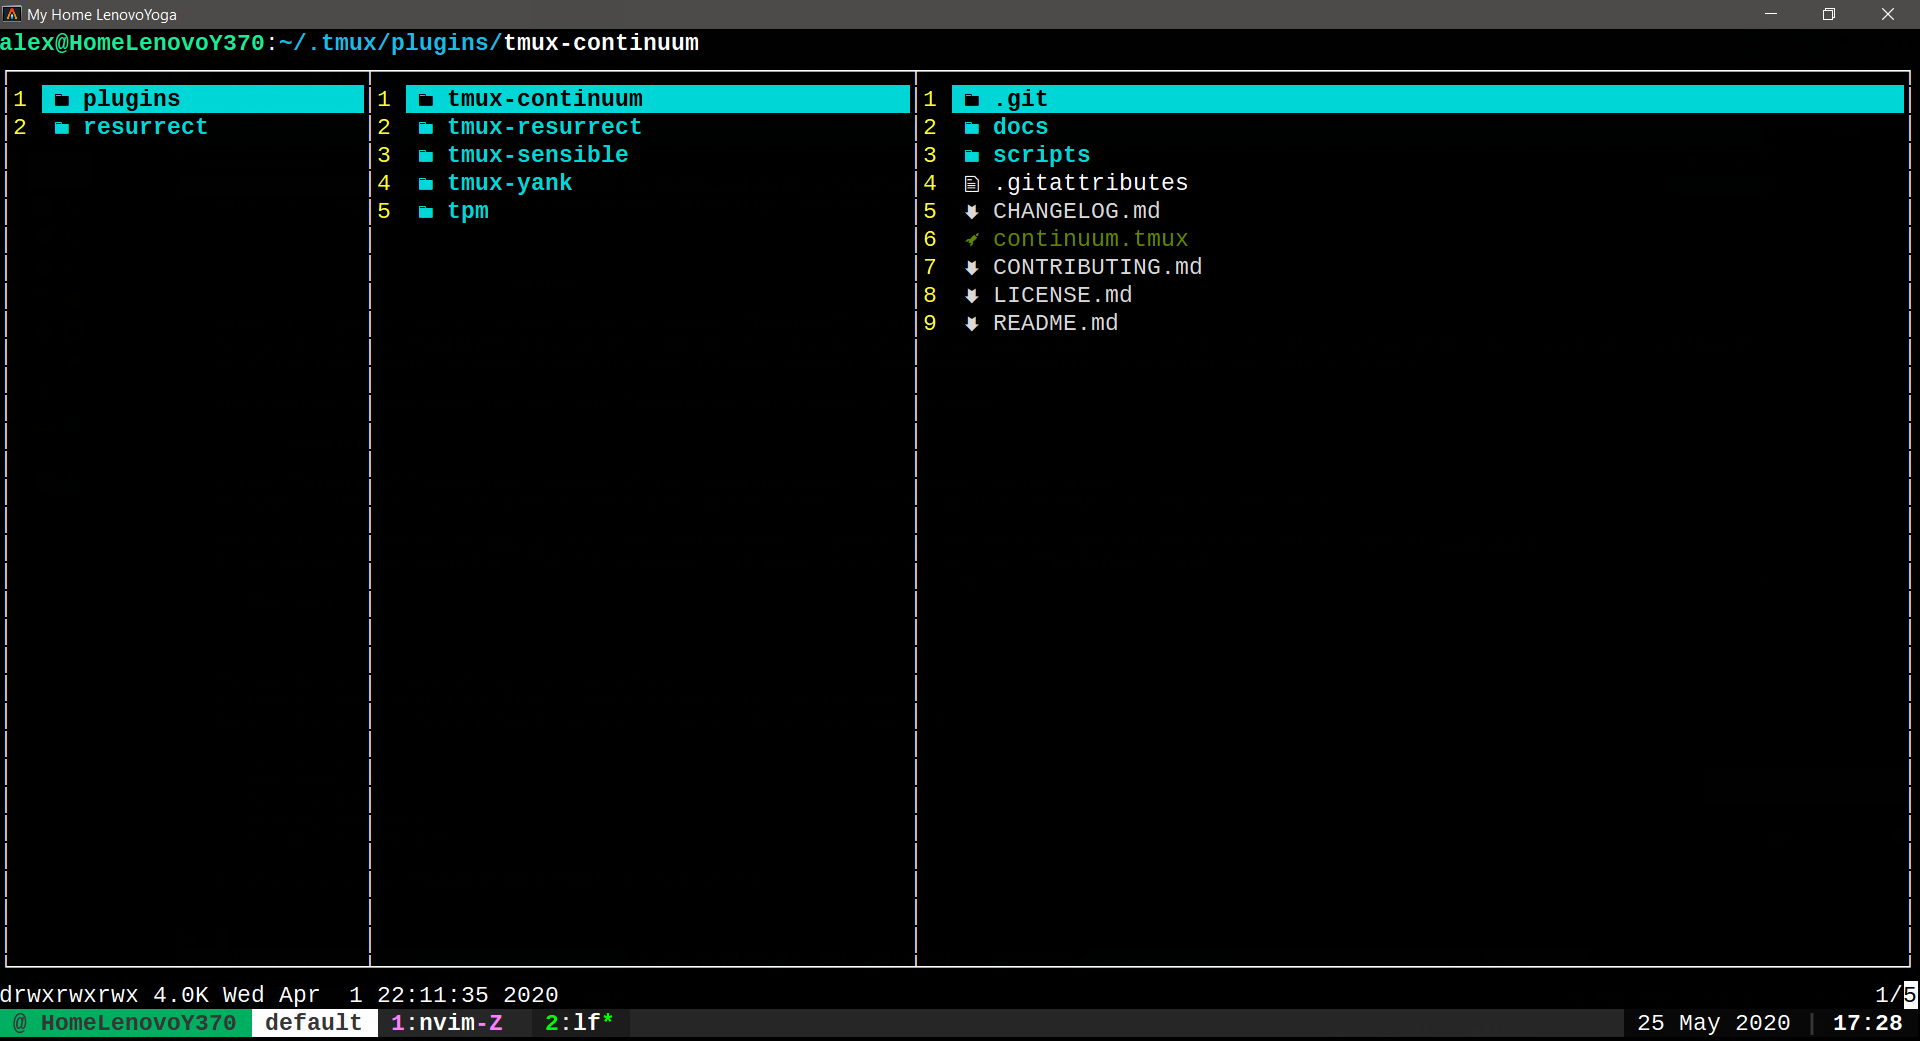
Alacritty Screenshot 2